People of all ages have long loved the enjoyable hobby of making paper aircraft. There’s something about the simplicity of folding a piece of paper and watching it take flight that brings joy to many. However, not all paper airplanes are created equal. Some may fly straight and true, while others may barely make it off the ground. If you’re tired of your paper airplanes crashing to the floor, then this guide is for you. In this step-by-step guide, we’ll show you how to make the perfect paper airplane that soars through the skies with ease. From selecting the right paper to mastering the folds, we’ll cover everything you need to know to become a paper airplane master. Get ready to impress your friends with your new skills and take your paper airplane game to the next level.
Introduction to the art of paper airplane making:
Welcome to the wonderful world of paper airplane making, where a simple piece of paper holds the potential to soar through the skies with grace and elegance. Crafting paper airplanes is an art form that has captured the imagination of people of all ages for generations. From young children folding their first airplane in school to aviation enthusiasts meticulously designing intricate models, there is a universal joy in creating something that can defy gravity and take flight.
In this step-by-step guide, we will delve into the fundamentals of paper airplane making, exploring the techniques, tips, and tricks that will help you master the craft. Whether you are a novice looking to embark on your paper-folding journey or a seasoned enthusiast seeking to refine your skills, this guide is designed to inspire and guide you towards creating the perfect paper airplane.
So, grab a sheet of paper, unleash your creativity, and let’s embark on this exciting journey together as we explore the art of paper airplane making.
Understanding the basics of aerodynamics for paper airplane:
When it comes to creating the perfect paper airplane, understanding the basics of aerodynamics is essential. Aerodynamics is the study of how air moves around objects, and it plays a crucial role in determining the flight characteristics of your paper creation.
One key concept to grasp is lift, which is the force that allows an airplane to stay airborne. By folding your paper in certain ways, you can manipulate the airflow around your airplane to create lift and keep it soaring through the air. Additionally, drag is another important factor to consider. Drag is the resistance that the air exerts on the airplane as it moves forward, and minimizing drag can help your paper airplane fly farther and faster.
Experimenting with different wing shapes, angles, and folds can help you optimize your paper airplane’s aerodynamics for maximum flight performance. By mastering these basic principles of aerodynamics, you’ll be well on your way to creating the perfect paper airplane that glides effortlessly through the skies.
Choosing the right paper for your airplane:
Choosing the right paper for your paper airplane is a crucial step in ensuring its flight performance and durability. The type of paper you select can greatly impact how well your airplane glides through the air and how long it holds its shape.
When choosing paper for your paper airplane, consider factors such as weight, thickness, and stiffness. Lighter weight paper will allow your airplane to fly farther, while thicker paper may provide more stability and durability. Stiffer paper can help maintain the shape of your airplane and prevent it from bending or folding mid-flight.
Experiment with different types of paper, such as standard printer paper, construction paper, or origami paper, to see which works best for your desired flying characteristics. Keep in mind that glossy or coated paper may not fold as easily and could affect the aerodynamics of your airplane.
Ultimately, the right paper choice will depend on your preferences and desired outcome for your paper airplane. Take the time to test out different papers and adjust as needed to create the perfect flying machine.
Step-by-step instructions for folding the perfect paper airplane:
To create the perfect paper airplane, it’s crucial to follow a set of step-by-step instructions carefully. Start by selecting a piece of paper that is rectangular in shape and free of any creases or folds. Lay the paper flat on a clean, smooth surface, and make sure it is positioned horizontally in front of you.
- Begin by folding the paper in half lengthwise, ensuring that the edges align perfectly. Use your fingers to crease the fold firmly, creating a sharp, defined edge along the center of the paper.
- Next, unfold the paper and fold the top two corners down towards the center crease. The edges of the corners should meet at the centerline, forming a triangular shape at the top of the paper.
- Once the corners are folded down, flip the paper over to the other side. Take the newly formed top edge of the paper and fold it down towards the bottom edge, creating a clean, straight edge at the top of the paper airplane.
- Now, fold the paper in half along the original center crease, bringing the top edge down to align with the bottom edge. Press down firmly on the fold to secure the shape of the paper airplane.
- To create the wings of the paper airplane, fold down the top layer of paper along each side, starting from the top edge and angling towards the bottom. The wings should be symmetrical and extend outwards from the body of the plane.
By following these detailed instructions and perfecting your folding technique, you’ll be able to create a sleek and aerodynamic paper airplane that soars effortlessly through the skies. Experiment with different paper sizes and weights to customize your design and achieve the perfect balance of lift and stability.
Tips for adjusting the design for different flight patterns:
When it comes to adjusting the design of your paper airplane for different flight patterns, there are several key tips to keep in mind. Firstly, consider the wing shape and size. For longer distance flights, you may want wings that are larger and more narrow, while for stunts and loops, smaller wings with a slight curve may be more effective. Experimenting with different wing shapes can greatly impact the flight pattern of your paper airplane.
We also need to take the weight distribution into account. Adjusting where the weight is placed on your paper airplane can help control its flight pattern. For example, adding a paperclip to the nose for more weight can help the plane fly further, while shifting the weight towards the back can help with loops and tricks.
Furthermore, the angle of the wings and tail can also play a significant role in determining the flight pattern of your paper airplane. Tilting the wings upwards can create more lift for longer flights, while angling the tail downwards can help with stability and controlled descents.
By carefully adjusting these design elements and experimenting with different configurations, you can master the art of creating paper airplanes that soar through the skies with precision and grace, tailored to different flight patterns and styles.
Testing and refining your paper airplane:
Once you have crafted your paper airplane according to the chosen design, it’s time to test and refine it for optimal performance. Testing is a crucial step in the process of creating the perfect paper airplane. Find a spacious area with plenty of room to launch your creation and observe its flight pattern.
Take note of how your paper airplane flies. Does it soar gracefully through the air or does it nose-dive quickly to the ground? Analyze the balance, stability, and aerodynamics of your design. Make adjustments by tweaking the wings, adding or removing weight, or adjusting the wing flaps to achieve the desired flight path.
Experiment with different launch techniques to see how they affect the flight of your paper airplane. Try launching it at different angles and speeds to determine the optimal launch strategy for maximum distance and airtime.
Refine your design based on the results of your tests. Make gradual adjustments and continue testing until you are satisfied with the performance of your paper airplane. Remember, mastering the skies requires patience, persistence, and a willingness to iterate on your design until you achieve the perfect balance of form and function.
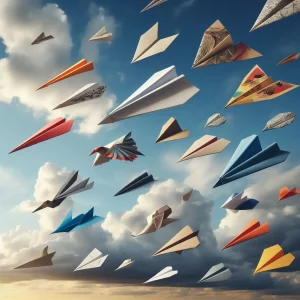
Advanced techniques for creating unique paper airplane designs:
When it comes to paper airplane design, there are endless possibilities for creating unique and innovative designs that soar through the skies with precision and style. Once you have mastered the basic techniques of paper airplane folding, it’s time to take your skills to the next level with advanced techniques that will set your creations apart from the rest.
Experiment with different paper weights and textures to see how they affect the flight characteristics of your paper airplanes. Thicker paper may provide more stability and durability, while lightweight paper can result in faster and more agile flights. By exploring a variety of paper options, you can discover the perfect balance for your desired performance.
Consider incorporating cutting and shaping techniques to add flair and functionality to your designs. Cutting slits or angles into the wings can alter the aerodynamics of the paper airplane, allowing for sharper turns or longer glides. Shaping the nose or tail of the airplane can also impact its stability and flight path, giving you greater control over its trajectory.
Furthermore, experimenting with different wing shapes, sizes, and angles can dramatically alter the performance of your paper airplane. Whether you opt for sleek delta wings, wide and stable swept wings, or unconventional asymmetrical designs, each choice will influence how your paper airplane flies through the air.
By combining these advanced techniques with your creativity and imagination, you can craft truly unique paper airplane designs that showcase your skills and passion for flight. Embrace the freedom of experimentation and innovation as you push the boundaries of traditional paper airplane folding to create aircraft that defy expectations and capture the wonder of flight.
Troubleshooting common issues with paper airplanes:
When it comes to creating the perfect paper airplane, it’s essential to troubleshoot common issues that may arise during the folding and flying process. One common problem that many paper airplane enthusiasts encounter is the issue of balance. If your paper airplane consistently veers to one side or flips over during flight, it may be due to an imbalance in weight distribution.
To troubleshoot this issue, try adjusting the folds of the wings or tail to ensure that the weight is evenly distributed across the plane. Additionally, experimenting with different paper weights or adding small weights to specific areas of the plane can help achieve better balance and stability.
Another common issue to watch out for is aerodynamic drag. If your paper airplane lacks lift or glides too quickly to the ground, it may be experiencing excessive drag. To troubleshoot this problem, make sure that the folds and creases of the plane are sharp and precise to reduce air resistance. Additionally, adjusting the angle of the wings or tail can help improve the aerodynamics of the plane for smoother flight.
By addressing these common issues and implementing troubleshooting techniques, you can enhance the performance and design of your paper airplanes, taking your flying creations to new heights of perfection.
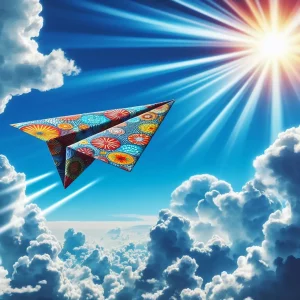
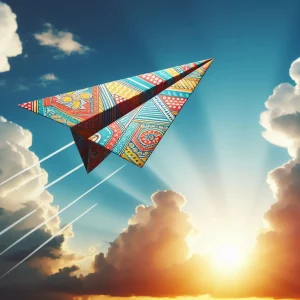
Creative ways to decorate and personalize your paper airplanes:
Personalizing and decorating your paper airplanes can add a fun and unique touch to your creations. There are countless creative ways to make your paper airplanes stand out and truly make them your own. One simple yet effective way to decorate your paper airplanes is by using colorful markers or pens to draw patterns, designs, or even funny faces on the wings or fuselage.
Another fun idea is to use stickers or decorative tape to add flair to your paper airplanes. You can choose from a variety of stickers such as stars, hearts, or even googly eyes to give your paper airplanes a playful and whimsical look.
For those looking to take their paper airplane customization to the next level, consider using colored paper or patterned origami paper to create visually stunning designs. Experiment with different paper textures and colors to create a fleet of paper airplanes that are as unique as you are.
Remember, the sky is the limit when it comes to decorating and personalizing your paper airplanes. Let your imagination soar and have fun adding your own personal touch to each creation.
Take flight with your new paper airplane skills
Congratulations on mastering the art of crafting the perfect paper airplane! By following this step-by-step guide, you have honed your skills and transformed a simple piece of paper into a flying marvel. As you send your paper airplane soaring through the air, remember the joy and excitement it brings, reminiscent of childhood days spent in carefree play.
Now that you have learned the techniques and tips to create a well-balanced and aerodynamic paper airplane, the sky is the limit. Experiment with different paper types, adjust your folds for varied flight patterns, and challenge your friends to see whose creation can fly the farthest.
Just like the journey of crafting a paper airplane, life is full of twists and turns. Embrace each fold and crease, knowing that with determination and practice, you can achieve great heights. So, grab a piece of paper, fold it with precision, and let your imagination take flight. May your paper airplanes soar high and inspire a sense of wonder and creativity in all who witness their graceful glide through the air.
We hope you enjoyed our step-by-step guide on how to make the perfect paper airplane. With a little bit of practice and attention to detail, you can master the art of creating paper airplanes that soar through the skies with grace and precision. Remember, the key is to experiment with different folds and adjustments to find the perfect design that works best for you. So take a piece of paper, start folding, and let your creativity run wild! Happy flying!
Read Also:
Leave a Reply