Why You'll Love It
- - Consistently tender whites and velvety yolks
- - Minimal equipment, just a pot and timer
- - Easy to scale for a crowd or a single snack
- - Perfect base for scrambled eggs or scotch eggs
*"I finally nailed the perfect yolk – creamy and bright!"* – Jenna, home cook
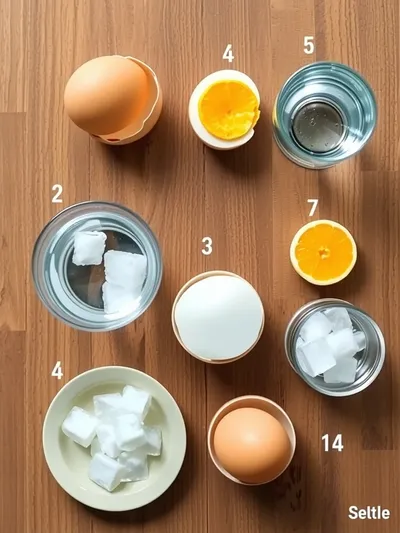
Essential Ingredient Guide
- Large eggs: Choose fresh but not ultra‑fresh eggs; a day or two old peel more easily.
- Cold water: Start with cold water to gently bring the eggs up to temperature, preventing cracks.
- Sea salt (optional): A pinch can help seal small cracks and add a subtle flavor.
- White vinegar (optional): A splash in the pot helps keep whites from leaking if an egg does crack.
- Ice cubes: Create an ice bath to halt cooking instantly, preserving the perfect texture.
- Pan or saucepan: A medium‑sized pot with a lid distributes heat evenly.
Complete Cooking Process
-
Ingredient Readiness:
Gather eggs, water, salt, and vinegar. Place eggs in a single layer at the bottom of the pot.
-
Flavor Development:
Bring water to a gentle boil, then cover and remove from heat – this is where the yolk sets just right.
-
Texture Control:
Let the eggs sit for 9‑12 minutes depending on size; the longer they rest, the firmer the yolk.
-
Finishing Touches:
Transfer eggs to an ice bath for at least 5 minutes to stop cooking and make peeling easier.
-
Serving Timing:
Serve warm, or refrigerate for up to a week for salads, snacks, or garnishes.
- Use a timer – consistency beats guesswork.
- Peel under running water to ease shell removal.
- For bright yolks, add a teaspoon of baking soda to the water.
- Store unpeeled eggs in the fridge to keep them fresh longer.
Pro Tips
Well, those little tweaks can really change the entire experience. I often find myself smiling as I watch the steam rise, knowing that in a few minutes I’ll have perfectly set yolks ready to brighten any breakfast plate. It’s a quiet joy, the kind that makes the kitchen feel like a cozy retreat.
The essence of the dish:
A fun fact or historical angle:
Flavor or sensory focus:
You Must Know
- Start with cold water for even cooking.
- Ice bath is essential for perfect texture.
- Adjust time for egg size – large vs. extra‑large.
Frequently Asked Questions
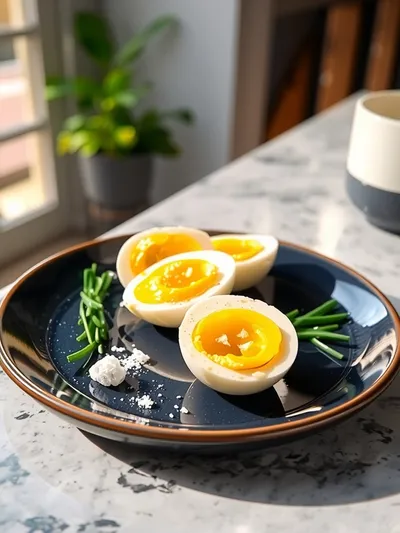
→ How do I know when the yolk is done?
For a fully set yolk, aim for 9‑12 minutes of resting time after boiling. Slightly shorter gives a softer center.
→ Can I use the same method for brown eggs?
Yes, the shell color doesn’t affect cooking; treat them the same way.
→ Should I add salt to the water?
A pinch helps if an egg cracks, but it’s optional.
→ How long can I store boiled eggs?
Unpeeled, they keep in the fridge for up to a week; peeled, use within 3‑4 days.
→ What’s the best way to peel them?
Tap gently, roll to crack, then peel under running water for easier shell removal.
→ Can I make them ahead for a salad?
Absolutely – prepare them a day early, keep them refrigerated, and slice when ready.
Chef's Tips
If you prefer a slightly softer yolk, reduce the resting time to 8 minutes.,Adding a teaspoon of baking soda to the water can make peeling even easier.,For a subtle flavor boost, sprinkle a pinch of smoked paprika on sliced eggs before serving.
Nutrition Facts
per serving
78
Calories
6g
Protein
0.6g
Carbs
5g
Fat
Taste Profile
Mild, buttery, and comforting
Ingredient Substitutions
Don't have an ingredient? Try these alternatives
Smaller eggs need 1‑2 minutes less.
Provides a cleaner flavor without altering texture.
Recipe Variations
Try these delicious twists on the original
Spicy Version
Add a pinch of cayenne and a dash of hot sauce to the water for a subtle heat.
Mediterranean Style
After peeling, drizzle with olive oil, sprinkle crumbled feta and chopped olives.
Common Mistakes to Avoid
Learn from others' mistakes for perfect results
- Overcooking leads to a green ring around the yolk.
- Skipping the ice bath results in a rubbery texture.
- Peeling while still warm makes shells cling.
Meal Prep & Storage
Make Ahead Tips
You can boil the eggs up to a day ahead; keep them in the refrigerator unpeeled for best freshness.
Leftover Ideas
Reheat gently in hot water for a minute, or enjoy cold in salads.
Perfect Pairings
Serve this with...
Cooking Timeline
Place eggs in pot and add cold water.
Bring water to a gentle boil.
Turn off heat, cover, and let eggs rest.
Transfer eggs to ice bath.
Peel and serve or refrigerate.
Perfect Hard Boiled Eggs Recipe
Learn how to make perfectly tender hard boiled eggs every time with simple tips, gentle timing, and a touch of kitchen wisdom that feels like a warm hug on a quiet morning.
Timing
Prep Time
5 Minutes
Cook Time
12 Minutes
Total Time
17 Minutes
Recipe Details
Ingredients
Main Ingredients
- 01 6 large eggs
- 02 Water to cover eggs
- 03 1 tsp sea salt (optional)
- 04 1 tsp white vinegar (optional)
- 05 Ice cubes for cooling
Instructions
Place eggs in a single layer at the bottom of a saucepan; add cold water to cover by about an inch.
Turn heat to medium‑high and bring to a gentle boil; once bubbling, turn off the heat, cover, and set a timer for 9‑12 minutes.
While the eggs are sitting, prepare an ice bath by filling a bowl with ice cubes and cold water.
When the timer is up, use a slotted spoon to transfer the eggs to the ice bath; let them sit for at least 5 minutes.
Gently tap each egg, roll to crack, and peel under running water; enjoy warm or chill for later use.
Notes & Tips
- 1 If you prefer a slightly softer yolk, reduce the resting time to 8 minutes.
- 2 Adding a teaspoon of baking soda to the water can make peeling even easier.
- 3 For a subtle flavor boost, sprinkle a pinch of smoked paprika on sliced eggs before serving.
Tools You'll Need
-
Saucepan
-
Slotted spoon
-
Timer
-
Large bowl for ice bath
-
Knife
-
Cutting board
Must-Know Tips
- Don't overcrowd the pan; give each egg room to move.
- Let the eggs rest covered for even heat distribution.
- Taste as you go – a pinch of salt can enhance the yolk.
Professional Secrets
- Room temperature eggs reduce cracking risk.
- Rapid cooling locks in the creamy yolk texture.
- Peeling under running water helps slip the shell away.

Recipe by
EvaEva is a seasoned home‑cook turned recipe developer who brings a dash of curiosity and a pinch of precision to every dish she creates for Your Website ...
Get Delicious Recipes Weekly
Join 25,000+ home cooks getting our best recipes straight to their inbox.
Free forever • No spam • Unsubscribe anytime