Why You'll Love It
- - Easy, hands‑on preparation that feels comforting
- - Bright lemon flavor that lifts any day
- - Portable size ideal for gatherings or solo indulgence
- - Minimal ingredients, no fancy equipment needed
*"These mini pies are a perfect balance of tart and sweet – my guests can’t get enough!"*
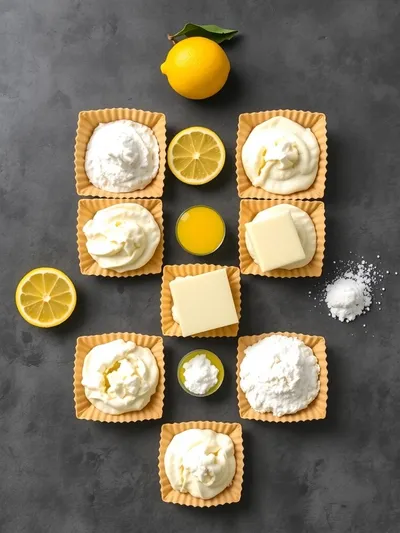
Essential Ingredient Guide
- All‑purpose flour: Provides the structure for a tender crust; sift for a light texture.
- Unsalted butter: Cold butter creates flaky layers; cut into small cubes before mixing.
- Cream cheese: Gives the filling its silky body; let it sit at room temperature for smoothness.
- Lemon zest and juice: Adds brightness; zest first, then juice so the flavor stays vivid.
- Granulated sugar: Balances the tartness; adjust slightly if you prefer a sweeter bite.
- Egg yolk: Acts as a binder for the filling, giving a gentle custard feel.
Complete Cooking Process
-
Ingredient Readiness:
Measure flour, chill butter, zest lemons, and soften cream cheese before starting.
-
Flavor Development:
Blend lemon zest into the filling for aromatic depth, then fold in juice gently.
-
Texture Control:
Handle the dough minimally; over‑mixing can produce a tough crust.
-
Finishing Touches:
Brush tops with a little egg wash and sprinkle extra zest for a glossy finish.
-
Serving Timing:
Let pies cool briefly; the filling firms up, making them easier to handle.
- Chill the dough for at least 30 minutes before rolling – it prevents shrinkage.
- Use a light hand when sealing edges to avoid tearing.
- Bake on a parchment‑lined sheet for even browning.
- Dust with powdered sugar just before serving for a delicate sparkle.
Pro Tips
Well, a little patience at each stage makes a world of difference. When the pies emerge from the oven, the golden tops glisten, and the aroma of lemon and butter mingles – a gentle invitation to pause and savour. So, set them out on a simple plate, perhaps with a tea or a coffee, and let the quiet indulgence begin.

The essence of the dish:
A fun fact or historical angle:
Flavor or sensory focus:
You Must Know
- Keep butter cold for flakiness
- Do not over‑mix dough
- Seal edges well to avoid leaks
Frequently Asked Questions
→ Can I make the crust ahead of time?
Yes, you can prepare and freeze the rolled dough for up to two weeks; bake directly from frozen, adding a couple of minutes.
→ What if I don’t have cream cheese?
You can substitute with an equal amount of mascarpone or Greek yogurt for a lighter texture.
→ How do I keep the pies from shrinking?
Chill the dough thoroughly and avoid over‑working it; a quick chill before baking helps retain shape.
→ Can I add a glaze on top?
A thin lemon glaze made from powdered sugar and fresh lemon juice adds a glossy finish and extra zing.
→ Are these pies suitable for gluten‑free diets?
Swap the all‑purpose flour for a 1‑to‑1 gluten‑free blend; the texture remains pleasant.
→ What’s the best way to store leftovers?
Keep them in an airtight container in the refrigerator for up to three days; gently reheat in a low oven before serving.
Chef's Tips
For extra lemon brightness, add a pinch of lemon zest on top before baking.,If the crust browns too quickly, cover the pies loosely with foil.,Feel free to swap the lemon zest for orange zest for a subtle twist.
Nutrition Facts
per serving
210
Calories
4g
Protein
22g
Carbs
12g
Fat
Taste Profile
Bright, creamy, and lightly tart
Ingredient Substitutions
Don't have an ingredient? Try these alternatives
Mascarpone yields a richer texture; yogurt makes it lighter.
Use a 1‑to‑1 substitution; the crust stays tender.
Recipe Variations
Try these delicious twists on the original
Spicy Version
Add a pinch of cayenne and a drizzle of honey for a subtle heat.
Mediterranean Style
Fold crumbled feta and chopped olives into the filling for a savory twist.
Common Mistakes to Avoid
Learn from others' mistakes for perfect results
- Over‑mixing the dough, which creates a tough crust.
- Filling the pies too heavily, causing leaks.
- Baking at too low a temperature, resulting in a soggy bottom.
Meal Prep & Storage
Make Ahead Tips
You can prepare the crust dough up to two days ahead and keep it wrapped in the fridge; fill and bake when ready.
Leftover Ideas
Reheat gently in a 300°F oven for 5‑7 minutes to restore crispness.
Perfect Pairings
Serve this with...
Cooking Timeline
Gather and prep all ingredients; zest and juice lemons.
Make crust dough, wrap, and chill.
Prepare filling by blending cream cheese, sugar, egg yolks, lemon.
Roll dough, cut circles, fill, seal, and place on baking sheet.
Bake pies, cool, then dust with powdered sugar.

Lemon Cheesecake Hand Pies – Easy Dessert
Discover bite‑size bliss with these lemon cheesecake hand pies – a buttery crust cradles tangy lemon curd and silky cheese, perfect for a quick sweet pause. Honestly, the aroma of citrus and buttery dough fills the kitchen, offering a quiet moment of joy. The recipe is simple, quick, and yields a golden‑brown pocket that holds a bright, creamy center.
Timing
Prep Time
20 Minutes
Cook Time
18 Minutes
Total Time
38 Minutes
Recipe Details
Ingredients
Crust
- 01 2 cups all‑purpose flour
- 02 1/2 cup unsalted butter, cold and cubed
- 03 2 tbsp granulated sugar
- 04 1/4 tsp salt
- 05 3–4 tbsp ice water
Filling
- 01 8 oz cream cheese, softened
- 02 1/4 cup granulated sugar
- 03 2 large egg yolks
- 04 2 tbsp lemon zest
- 05 3 tbsp fresh lemon juice
- 06 1 tsp vanilla extract
Instructions
In a bowl, combine flour, sugar, and salt; cut in the cold butter until the mixture resembles coarse crumbs.
Add ice water a tablespoon at a time, stirring gently, until the dough just comes together. Form into a disk, wrap, and chill for 30 minutes.
While the dough rests, whisk cream cheese, sugar, and egg yolks until smooth; fold in lemon zest, juice, and vanilla.
Roll the chilled dough on a lightly floured surface to about 1/8‑inch thickness; cut circles (4‑inch) using a cutter.
Spoon a tablespoon of filling onto each circle, fold over, and press edges with a fork to seal.
Place pies on a parchment‑lined sheet, brush with a quick egg wash, and bake at 375°F (190°C) for 15‑18 minutes, until golden.
Cool on a rack, then dust with powdered sugar or drizzle a lemon glaze if desired.
Notes & Tips
- 1 For extra lemon brightness, add a pinch of lemon zest on top before baking.
- 2 If the crust browns too quickly, cover the pies loosely with foil.
- 3 Feel free to swap the lemon zest for orange zest for a subtle twist.
Tools You'll Need
-
Mixing bowl
-
Food processor (optional)
-
Rolling pin
-
Round cutter
-
Baking sheet
-
Parchment paper
-
Pastry brush
Must-Know Tips
- Don't over‑mix the dough, it can become tough.
- Chill the dough before rolling; it prevents shrinkage.
- Seal edges well to avoid leaking filling.
Professional Secrets
- Use ice‑cold butter for flaky layers.
- Brush with egg wash for a glossy finish.
- Let pies rest a few minutes after baking for filling to set.

Recipe by
EvaEva is a seasoned home‑cook turned recipe developer who brings a dash of curiosity and a pinch of precision to every dish she creates for Your Website ...
Get Delicious Recipes Weekly
Join 25,000+ home cooks getting our best recipes straight to their inbox.
Free forever • No spam • Unsubscribe anytime